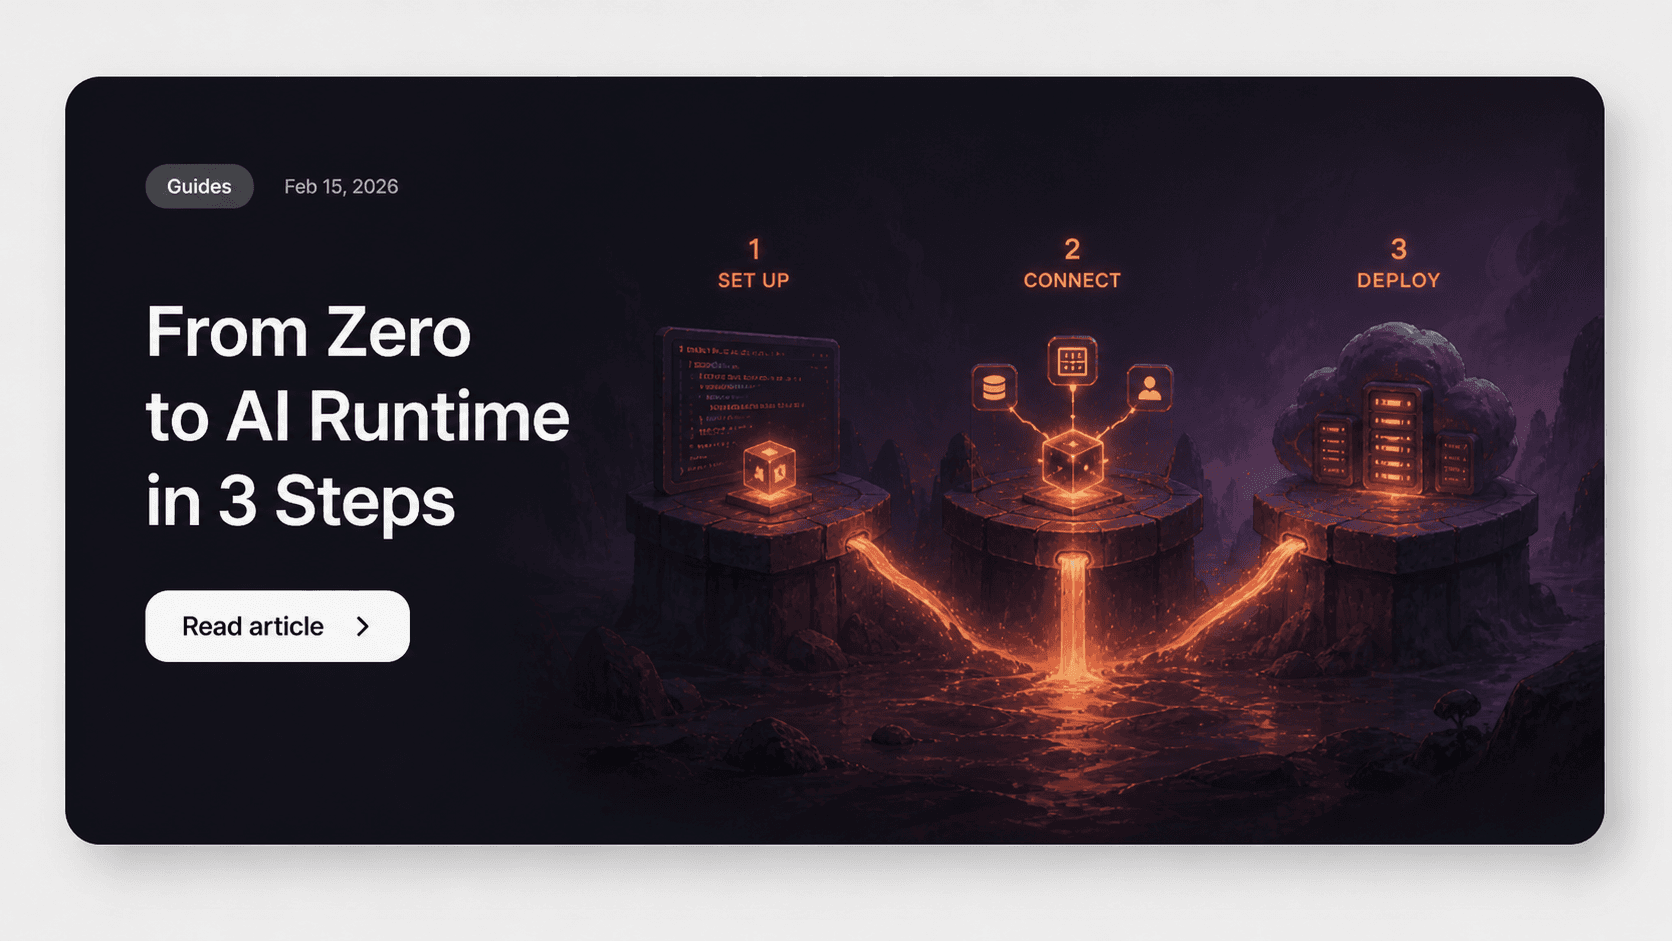
the short version: drag a Runtime, a Gateway, and a Volume node onto the canvas, connect them, hit deploy. ShipClaw provisions an isolated OpenClaw container with persistent storage, a wildcard URL, and automatic SSL in minutes. thats the whole tutorial. everything below is detail.
you want to give each customer their own AI runtime. you dont want to write terraform. yeah fair enough.
ShipClaws visual builder lets you design your whole deployment topology by dragging nodes onto a canvas. no yaml. no config files. no 47-step devops runbook that makes you question your career choices.
heres the full workflow from zero to a running OpenClaw runtime.
step 1: design your topology
open the builder. youll see an empty canvas with grid background and a node palette on the left.
the palette has six node types:
- Runtime -- the OpenClaw container itself. this is the AI engine your customer talks to.
- Gateway -- routes traffic from
slug.agents.shipclaw.ioto the right runtime. handles SSL automatically so you dont have to think about certs. - Volume -- persistent storage mounted at
/data. survives container restarts and redeployments. your data doesnt vanish. - Env Config -- environment variables for the runtime. API keys, model settings, feature flags, whatever you need.
- Control Plane -- management layer that provisions and monitors everything behind the scenes.
- Custom Domain -- point your own domain to any tenant runtime. enterprise customers always want this.
drag a Runtime node onto the canvas. then drag a Gateway and a Volume.
thats your minimum viable topology: AI runtime with traffic routing and persistent storage. takes about 30 seconds.
want env variables? drag an Env Config node. custom domain? drag that too. the builder doesnt force some rigid architecture on you. you compose what you actually need.
step 2: connect the pieces
click the bottom handle of Gateway node, drag to top handle of Runtime node. connection appears. traffic now flows from gateway to runtime.
connect Volume to Runtime. runtime now has persistent storage.
connect Env Config to Runtime. environment variables get injected at container startup.
each connection is a real infrastructure relationship. the gateway actually routes to the runtime. the volume actually mounts. the env config actually injects. its not a diagram. its the real thing.
click any node to open config panel on the right side. set container image version, memory limits, volume size, env var key-value pairs, custom domain settings, whatever.
pro tip: hit Cmd+K to open command palette. type the node name and press enter. way faster than dragging if you know what you need.
step 3: deploy
hit deploy. thats it.
ShipClaw takes your canvas topology and provisions real infrastructure. actual containers running on actual servers.
each tenant gets:
- dedicated Docker container running OpenClaw
- persistent volume at
/data - environment variables injected from your config
- unique wildcard URL with automatic SSL
- independent resource allocation (no noisy neighbors)
deployment takes minutes not hours. and because each tenant is isolated, deploying one customers runtime never affects another. (why isolation matters this much is its own post.)
what you just skipped
lets appreciate the stuff you didnt have to do:
- write a Dockerfile
- configure a reverse proxy
- set up SSL certificates
- manage persistent volumes
- write kubernetes manifests
- create a CI/CD pipeline
- build a tenant provisioning system from scratch
- handle wildcard DNS routing
- write infrastructure-as-code
- debug why nginx isnt routing properly at midnight
all of that is handled by the platform. you designed a topology on a canvas and clicked deploy. (if youre tempted to build that list yourself anyway, read the hidden cost of DIY tenant provisioning first.)
people are building real businesses on this
that 3-step process isnt theoretical. people are shipping actual products and making real money with it.
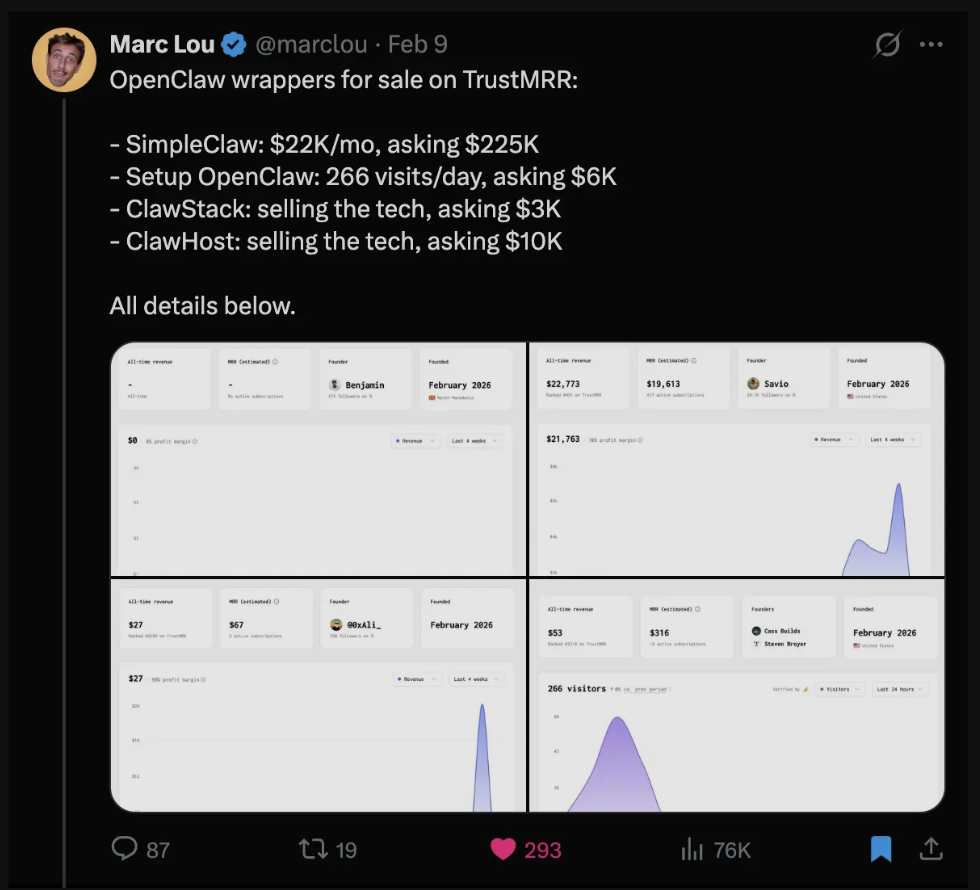
Marc Lou posted a list of OpenClaw wrappers for sale on TrustMRR. SimpleClaw doing $22K/mo asking $225K. Setup OpenClaw pulling 266 visits per day asking $6K. ClawStack and ClawHost asking $3K-$10K each. These are all products people built on top of isolated OpenClaw runtimes. Some of them started with the exact same 3 steps you just read about.
thats the thing about getting your infrastructure out of the way fast. you dont just save time. you start generating revenue sooner. and the gap between "shipped last month" and "still building infra" gets wider every week.
beyond the basics
once your runtime is live the builder isnt done with you.
add nodes later. enterprise customer needs a custom domain? drag one onto the canvas and connect it. redeploy. done in about 2 minutes.
modify configs. click any node, update the env vars or resource limits, redeploy. changes propagate to the running container. no ssh needed.
clone topologies. built a topology you like? it saves to your workspace automatically. use it as template for new customers. stop rebuilding same thing over and over.
monitor from dashboard. each runtime shows status, uptime, resource usage. no need to ssh into containers or parse raw logs to figure out whats going on.
the takeaway
the gap between "i want to give each customer their own AI runtime" and "its live and working" should be minutes. not weeks. not months.
design the topology, connect the pieces, deploy. go grab a coffee. its done before you get back. and if you dont want to start from a blank canvas, the agent templates give you a working starting point.